Sunday, November 25, 2007

Street Pano Head # 3

Okay.. I'm burned out on this project - but here goes: The latest NOT field tested prototype.

First the basic criteria for a Street Pano head as I see it:
1. Must not interfere with normal street shooting.
2. Be quick to set up and unobtrusive in use.
3 Provide for smooth stable pan around nodal point while handheld.
So I gathered this stuff:
And made this:
That fits on the camera like so:

and then you use it like this:The plastic bottle neck attaches at the nodal point using a cable tie and the rotates around the dowel. The concept I think is reasonable sound, the execution could use some refinements. That's it for now.

Thursday, November 15, 2007

Street Pano Head

CHAPTER ONE
I am not very patient but I am persistant, an odd combination that sometimes leads me down strange paths. This is one of them. I wanted to make a pano- head for the street snake. The basic criteria required something to hold the camera vertical and allow easy panning around the nodal point. I went to Lowes and bought this: And made this:The camera mounts vertically placing the handle right under the nodal point. The camera swivels on the bolt, and the street snake attaches to the eye bolt. I was testng it and seemed to work okay but then it broke - right where the two pieces of aluminum are epoxied. A nut and bolt would solve the problem...

CHAPTER TWO
But then I got a "better" idea, so (chapter TWO) I got this stuff-

And I made this:
Same idea, but the camera mount is different and the grip is made like this:
Two nuts are epoxied to strips of aluminum and the end of the bolt threads into the tilt head. When the camera pans the bolt spins on the nuts. That means for a 180 degree pano, the camera would move up (or down) 1/32 of an inch. Since it's hand held that a amount of movement is tolerable and it allows for a pretty cool design.. Heres the bottom view:Another view.

But, and it pains me to admit this.. it seems a little clumsy and ominous for street work... and... I have a much better idea. Cheap, easy, effective, transparent on the street... stay tuned for the THIRD (and final?) CHAPTER.

Tuesday, November 13, 2007

Down But Not Out

I've been working on an exciting new piece of Street Photography gear that I was hoping to debut tonight. I'd made a working prototype and was taking pictures of it - when it broke. Fortunately there is a fix but it means a few days delay.

And as I'm writing this rather off-the-cuff fill-in post, I realized that I'm really into problem solving. Even my approach to Street Photography and Art in general is that it is a problem to be solved. But while there are technical and graphic code quandarys the Truth as it is revealed to me is that Art is NOT a crossword puzzle nor a quadratic equation.

Art is Fashion. And if you are a Street Photographer or an Artist of any stripe, then you are in the Fashion Industry.

Art is fashion. Art is a hemline.

Saturday, November 3, 2007

SHOW TIME

When it comes to displaying your photos...The Web is cool. Books are nice.


But the true test, the art-historical standard for the battle of hearts and minds, takes place on The Wall.

Works on paper - watercolors, charcoles, photographs, etc. - have traditionally been hung in glassed frames with mats. But mats are to photographs what button down collars are to shirts. Stuffy, stifling, out-dated and ultimately unnecessary.

But that was then and this is
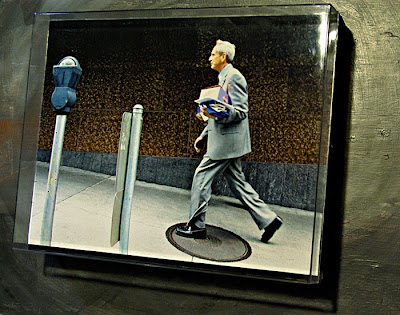
NOW - for works in sizes up to 18" x 24" - the bONGO BOX:
Not available in stores anywhere, but you can make it yourself. You'll need an acrylic box frame -( an 11x14 goes for around $6.US):Take out the cardboard insert and throw it away. Trace around the outside edges of the acrylic box onto a piece of MDF and then cut it out. Next make a cradle for the MDF out of 1x2's or something similar. Glue the MDF to the cradle. The sides of the MDF/cradle and the the sides of the acrylic box should all be flush..

If you don't have a miter saw nor clamps for gluing make the cradle using straight cuts, then use books or something heavy to weight down the pieces until the glue dries.
Then sand as needed and paint. Next apply double stick archival tape to the back of the photo and attach it to the MDF (for long term display first glue acid-free paper to the MDF).

Now the last step - fasten the acrylic box using clear silcone sealant around the outside seam where the box touches the MDF - and voila!

OWN THE WALL with the bONGO BOX - photo display for the 21st century.


Thursday, November 1, 2007

Set Theory

When I first put my street photos on bONGOLIA, I loosely organized what I had at the time into groups of about ten images that seemed more or less to go together and called that a SET. Since that time whenever I get a new batch of nine or ten keepers I upload them and also call that a SET. But I think the term SET in photography should mean something more than "the latest wad of snaps I took". A SET should be a carefully constructed group of images organized around an implicit or explicit principle or theme. And the order of display should be just as considered as the selection of images.

For the street photographer that shoots as I do, with no subject nor agenda and no plan other than to take what the street has to offer - for that type of street shooter, creating a SET (in the proper sense of the term) becomes something of a venture fraught with agonizing reappraisals but rewarded with an occasional flash of insight.

I will have more to say about that process but for now I want to present the LINK to: